Tile Popping |Reason and How to Repair Pop-Up Tiles
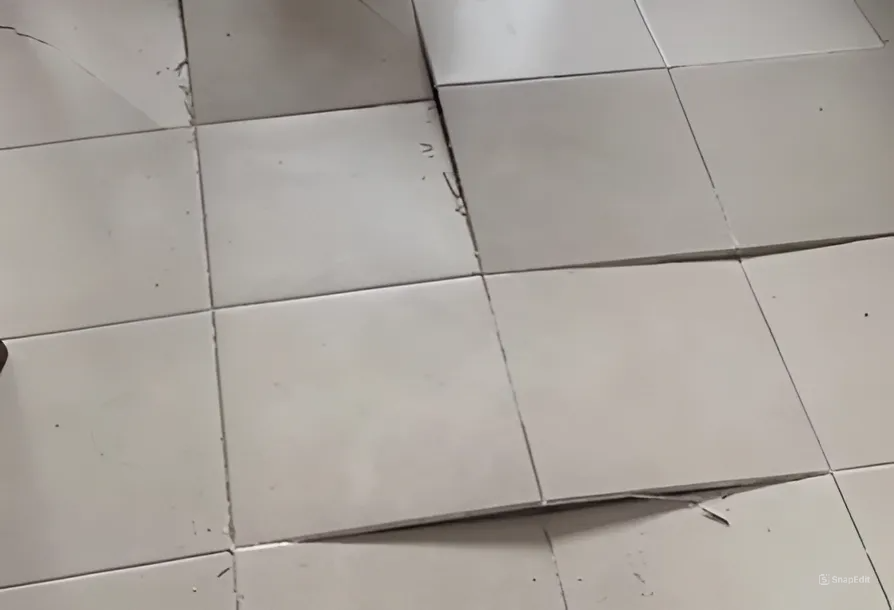
In this article, we will discuss the issue of tile popping, the reasons behind it, and how to repair pop-up tiles. Tile popping refers to tiles that have become loose or raised from the surface, creating an uneven or unstable floor. This can be a common problem in both residential and commercial settings, and it is important to address it promptly to prevent further damage and potential safety hazards.
What is Tile Popping?
Tile popping refers to a common issue where tiles or flooring materials become dislodged or pop up from their original position. This can occur due to various factors such as improper installation, subfloor issues, moisture problems, or structural movement. When tiles pop up, they create uneven surfaces, gaps, and potential safety hazards. Addressing tile popping involves identifying the underlying cause, repairing or reattaching the affected tiles, and taking preventive measures to ensure the tiles remain securely in place. Proper installation, subfloor preparation, and maintenance are key factors in preventing tile popping and maintaining the integrity of tiled surfaces.
Causes of Tile Popping
Tile popping, or tiles becoming dislodged or “popping” off the surface they were originally installed on, can be caused by several factors. Here are some common reason of tile popping:
An uneven subfloor can create stress points on tiles, causing them to pop or crack over time as weight is unevenly distributed.
If the surface isn’t cleaned properly before installation, residue or debris can interfere with the adhesive’s ability to bond effectively, leading to tile popping.
Poor Adhesive Quality or No Adhesive
Using low-quality adhesive or failing to use adhesive altogether can result in inadequate bonding between tiles and the substrate, leading to tiles coming loose.
Unfavorable Weather Conditions
Extreme temperatures, high humidity, or rapid changes in weather can affect the curing process of adhesives, potentially compromising their bond strength and causing tile popping.
Incorrect spacing between tiles can lead to stress points and inadequate support, increasing the likelihood of tiles popping or cracking.
Improper installation techniques by unskilled workers can result in various issues, including inadequate adhesive application, improper spacing, or failure to address subfloor irregularities, all of which can contribute to tile popping.
Also Read:
- Concrete Stairs Reinforcement Details
- Tools for Tiling
- Epoxy Flooring
- Flooring Options for Your Home
- Steel Deck Installation and Construction
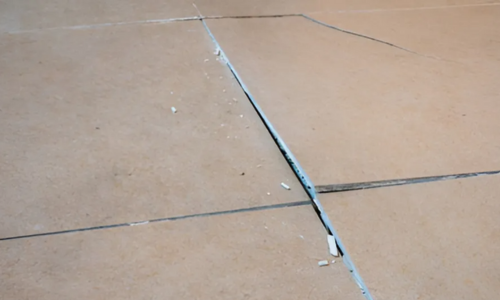
Repairing Popped Tiles
Repairing popped-up tiles requires careful attention and proper techniques to ensure a secure and long-lasting fix. Here are the general steps to repair pop-up tiles:
Carefully remove the tile that has popped up. Use a putty knife or a similar tool to gently pry it away from the surface. Be cautious not to damage the surrounding tiles.
Clean the area where the tile was removed, ensuring that it is free from any debris, adhesive, or grout. Use a scraper or a damp cloth to clean the surface thoroughly.
If there is any adhesive or grout residue left on the surface, scrape it off using a putty knife or a scraper. Make sure the surface is smooth and clean before proceeding.
Apply a thin layer of tile adhesive to the back of the tile using a notched trowel. Spread the adhesive evenly, making sure to cover the entire back surface of the tile.
Carefully place the tile back into its original position, pressing it firmly into the adhesive. Use a slight twisting motion to ensure a good bond. Make sure the tile is level with the surrounding tiles.
Let the tile adhesive dry according to the manufacturer’s instructions. This usually takes 24 to 48 hours. Avoid walking on or applying any pressure to the repaired tile during this time.
Once the adhesive is fully dry, apply grout to the gaps between the tiles. Use a grout float to push the grout into the gaps and smooth it out. Wipe away any excess grout with a damp sponge.
After the grout has dried, clean the tiles with a damp cloth to remove any grout haze. Once the tiles are clean and dry, apply a tile sealer to protect them and enhance their appearance.
Tools to Repair Pop-Up Tiles
When repairing pop-up tiles, it’s helpful to have the following tools on hand:
Tile Cutter or Wet Saw
A tile cutter or wet saw is essential for cutting tiles to the desired size and shape. This tool allows you to make precise cuts, ensuring that the replacement tile fits perfectly into the space.
Notched Trowel
A notched trowel is used to apply adhesive to the subfloor before placing the tile. The notches on the trowel create grooves in the adhesive, which helps improve bonding between the tile and the subfloor.
Nippers
Nippers are used for cutting irregular or small pieces of tile. They are particularly useful for fitting tiles around pipes or creating mosaic tile installations. Nippers allow for more precise and intricate cuts.
Tile Spacers
Tile spacers are small plastic or rubber devices that help maintain consistent spacing between tiles. They are placed at the corners of each tile to ensure even grout lines and a professional-looking finish. Tile spacers also help keep the floor level and ensure an equal amount of grout is filled through the gaps.
Grout Float
A grout float is used to apply and smooth grout into the grout joints between tiles. It helps spread the grout evenly and ensures that it fills all the spaces between the tiles. A grout float also helps remove excess grout from the tile surface.
Tile Leveling System
A tile leveling system is a set of clips and wedges that helps keep the tiles level with minimal error. This system is particularly useful when dealing with large format tiles or tiles with uneven edges. The leveling system helps prevent lippage, where one tile is higher or lower than its neighboring tiles.


